Adding an Author’s Byline to Blog Posts
This training explains how to add a clickable author byline to a blog post. The byline should appear at the top of each post and link to that author’s “About the Author” page, which must be nested under the Blog section.
You’ll learn how to:
- Navigate to the blog post using the Pages and Layers panels
- Insert the byline in the correct content container
- Link the author’s name to their profile page
- Confirm the link and page structure
- Publish the updates
This process supports consistency across blog content, improves internal linking, and gives site visitors a way to learn more about each contributor.
Assumptions Before You Start:
- At least one blog post has been written and published.
- The main Blog page is live and nested under the global-level “About” section (or equivalent).
- The author has passed along their bio
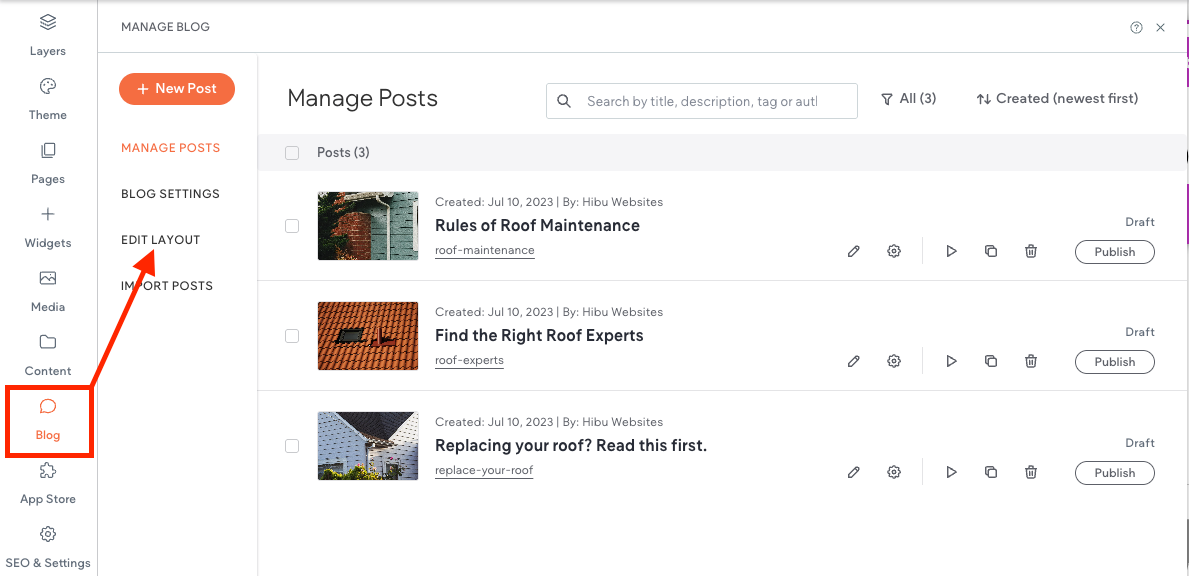
Step 1 – Open the Side Panel (Left)
- Click Blog
- Click Edit Layout
Step 2 – Click to the Left of the Post Title
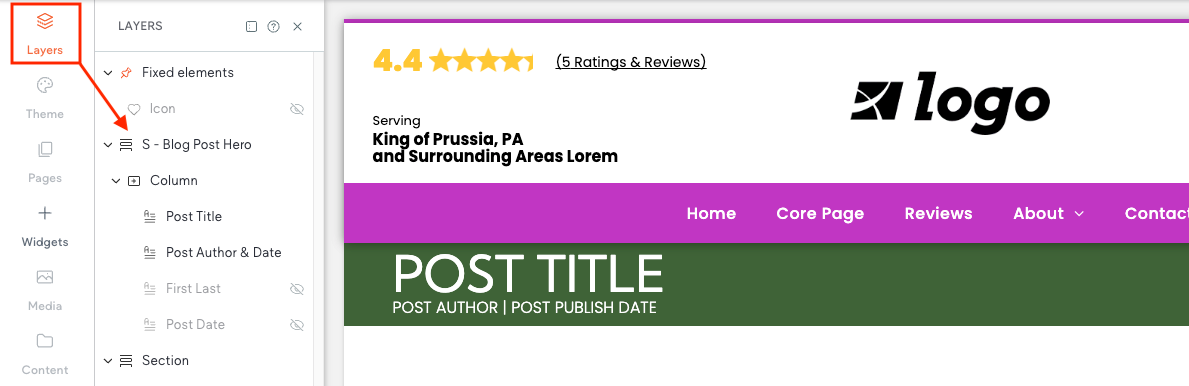
Step 3 – Open Layers Panel
- Locate S-Blog Post Hero Section
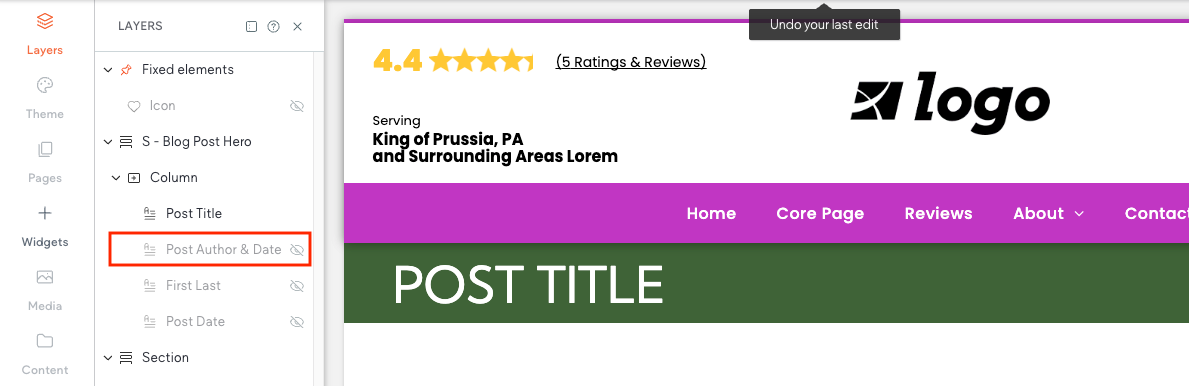
Step 4 – Hide and Unhide Blog Elements
- Click “Post Author & Date,” then click the eye icon to hide it.
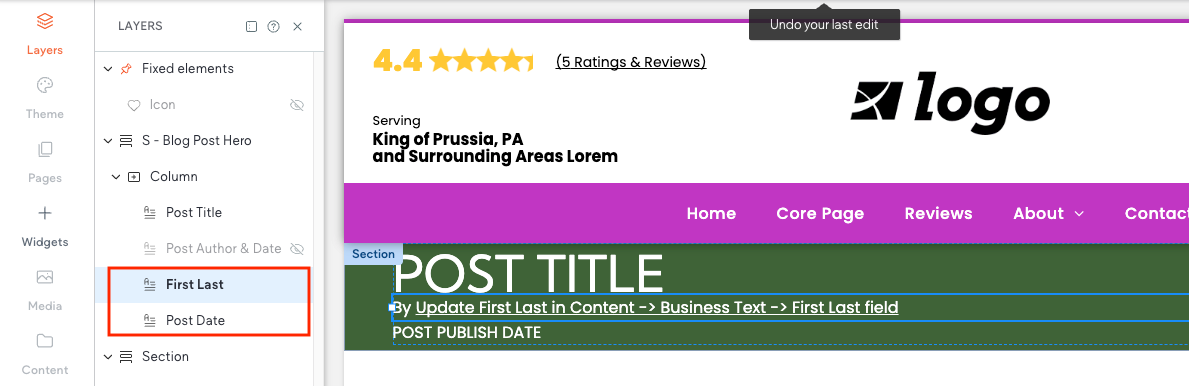
- Click “First Last,” then click the eye icon to unhide it.
- Click “Post Date,” then click the eye icon to unhide it.
- Repeat on Tablet and Mobile devices
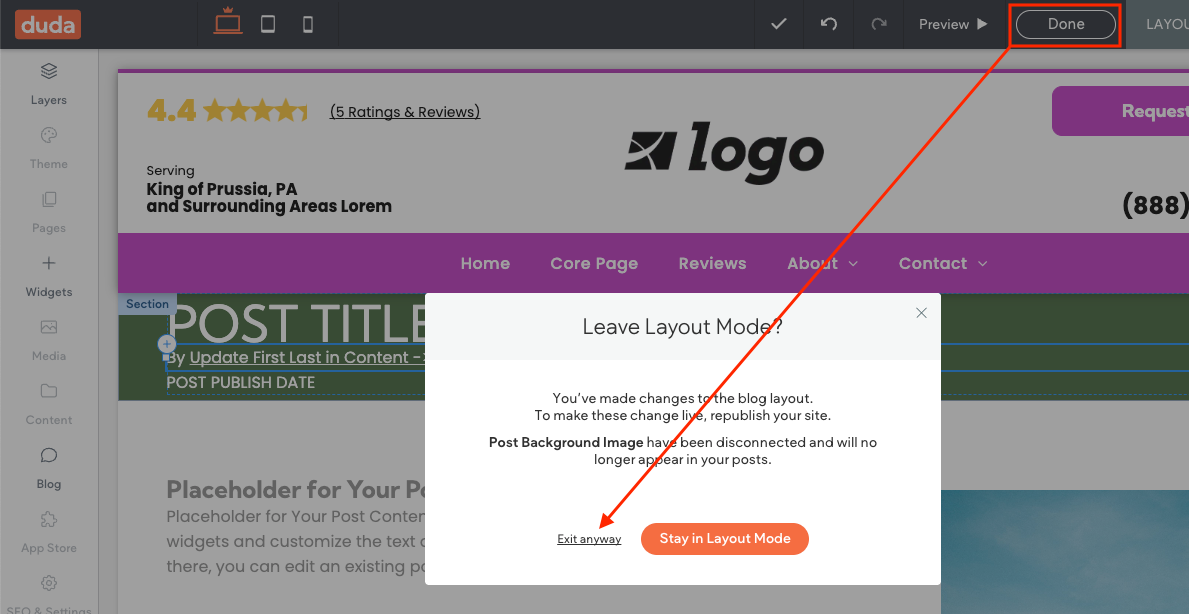
Step 5 – Close Edit Layout Screen
- Click
Done button, then
Exit anyway
Step 6 – Update Byline First Name Text
- In the left panel, click “Content,” then select “Business Text.”
- Locate the First Last field. Replace the placeholder text with the author’s full name.
- Add professional credentials, such as DDS, Esq., or PhD, after the name
- Stephen E. Paul, MDStephen E. Paul, MD
- Do not include titles like Dr. or Attorney before the name — these are typically not used in bylines
- There is
no “Save” button on this screen.
- Simply
click anywhere inside the editor frame to lock in the name.
- This will also automatically close the Business Text overlay.
Step 7 – Unhide First Last Page
- In the left panel, click “Pages."
- Scroll through the page list to locate the
“About”
page (or its equivalent).
- Under “About,” find the "First Last" page and Click the
three-dot menu
to the right of that page name.
- Select
“Stage Draft for Publish.”
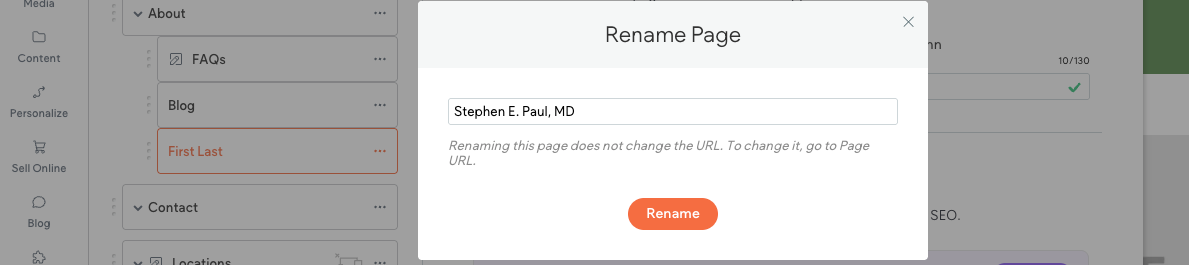
Step 8 – Update First Last Page Name
- Click the
three-dot menu to the right of First Last and click Rename
- Enter author's name as entered by line
- Example: Stephen E. Paul, MD
- Click Rename to save and close window
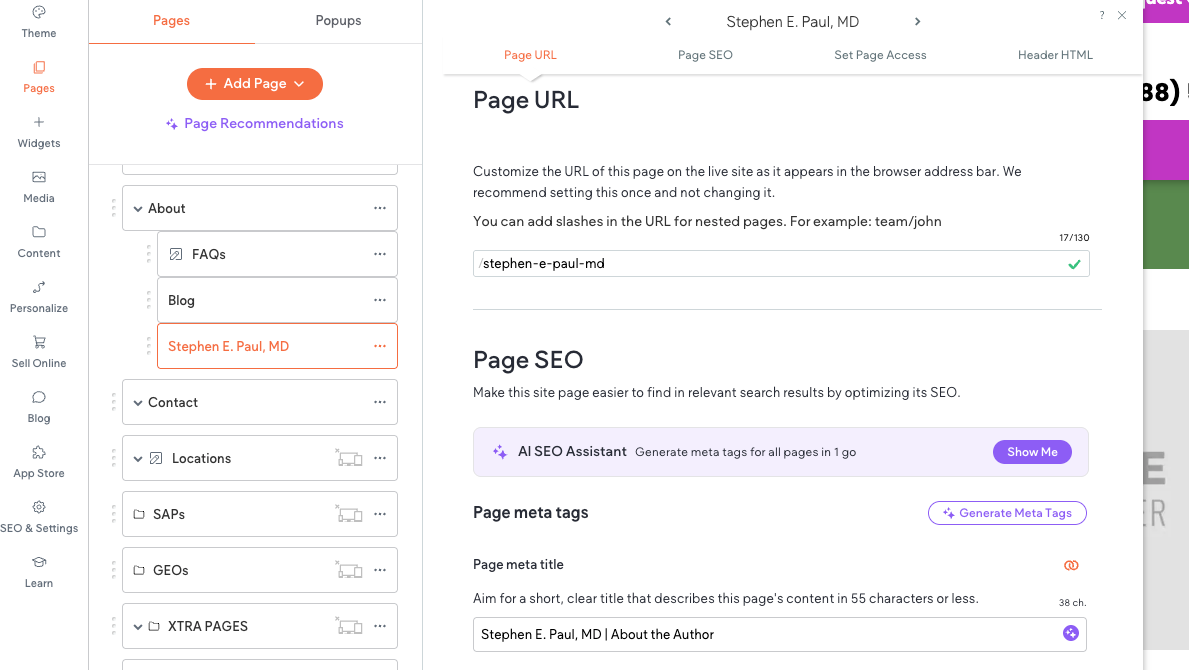
Step 9 – Update First Last Page Slug, Title and Meta Description
- Update the Page URL by replacing the placeholder text (
first-last
) with the author’s full name, matching the byline and page name. - Example:
stephen-e-paul-md
- Then update the Page Meta Title and Page Meta Description as follows:
- Title Tag:
Prefix First Last, Title | NOB
- Example:
Stephen E. Paul, MD | About the Author
- Meta Description:
NOB [verb] offers / provides / serves / specializes in [core business keyword or phrase] [City, ST or serving area]. Motivating factor. Motivating factor (space permitting). Motivating factor (space permitting).
- Example:
Dr. Stephen E. Paul, a board-certified specialist serving Atlanta, GA. Decades of experience. Highly rated by patients. Focused on outcomes.
-
Close SEO edit screen
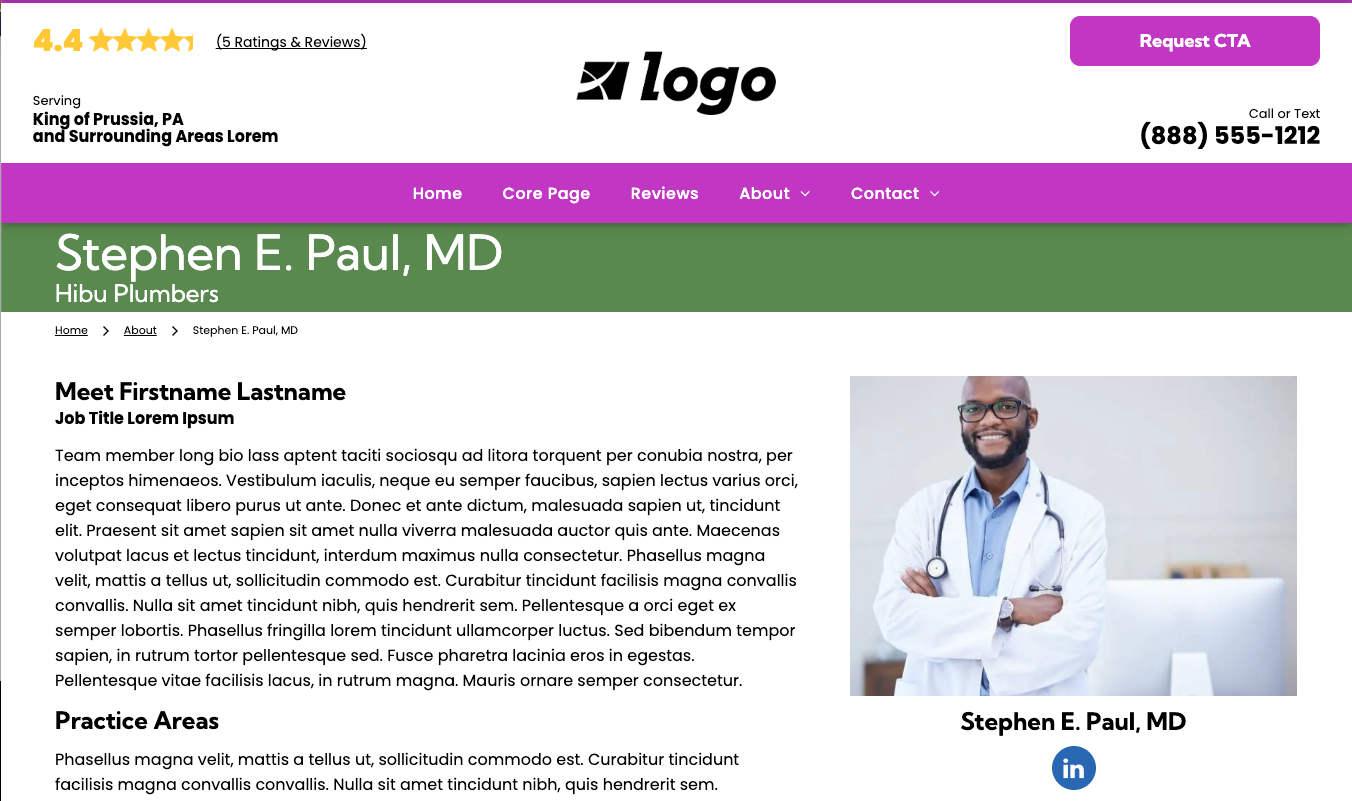
Step 10 – Update Author Page
- Update the
Thin Hero placeholder text labeled
“First Last” with the name of the author, as defined in earlier steps.
- Copy, paste, and edit the
client-provided bio, if necessary.
- Upload the
client-provided headshot.
- Update the
“First Last” photo caption with the author’s name, as defined in earlier steps.
- Update the
LinkedIn social icon with the author’s
LinkedIn profile link.
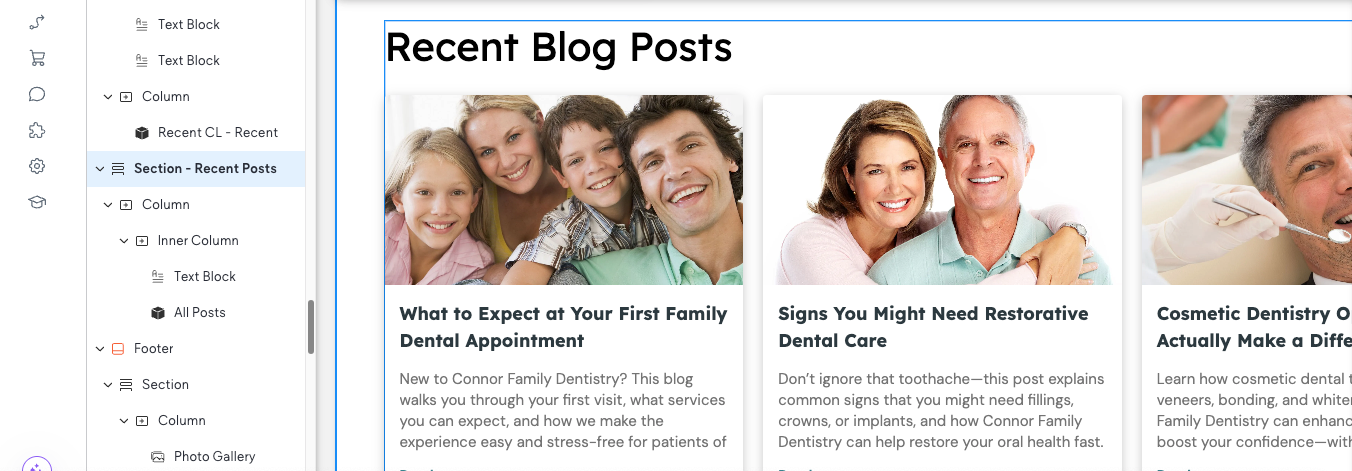
Step 11 – Add Recent Blogs to Home and Content Landing Pages
- Open home page and scroll down to Recent Review.
- Click to the left of the speech bubble icon
- Open Layers panel
- Locate Reviews CL - Recent
- Click “Section - Reviews Posts,” then click the eye icon to unhide it.
- Repeat on Tablet and Mobile devices