RevLocal Microsite Migration
Overview & Setup
Introduction
Hibu is converting one-page RevLocal microsites into one-page Hibu websites. While Hibu has pre-built the basic structure of these sites, designers need to complete several key elements to finalize the conversion. Throughout this guide, we refer to these Hibu one-page websites as "Hibu Microsites" for simplicity, though this is not an official product name. This guide outlines how to access and complete these partially built websites.
Important Terminology
- RevLocal Microsite: The original, live one-page client website on RevLocal's platform
- Hibu Microsite: The new, partially built one-page website on Hibu's Website Platform (HWP)
Prerequisites
- Access to client's live RevLocal Mmicrosite
- Access to Prebuilt Hibu Microsites
- Login URL: https://my.websites.hibu.com/login
- Username: rebuilder@hibu.com
- Password: Hibu#nd1
Prebuilt Hibu Mirosite Content
Each pre-built Hibu Microsite includes these automated elements from the client's Yext account:
- Business Information
- Business Text
- Hero image H1
- Motivating Factors
- Title and meta description (where available)
- Note:
If no meta description exists, none will be created
Designer Tasks
Complete these steps to finalize each Hibu Microsite:
- Create backup
- pre_firstlast (pre_jamesclark)
- Import all microsite images
- Populate the image gallery
- Assign hero image and logo in Business Images
- Apply microsite color scheme to site Theme
- Add external links to global navigation
- Remove duplicate contact info
- Site Check
- Create backup
- post_build_firstlast (post_build_james-clark)
Note: Reviews widget updates will be handled by the development team after designer tasks are complete.
Step 1: Site Backup
- pre_firstlast (pre_jamesclark)
Step 2: Import Microsite Images
- Access Media Manager
- Click Content in the side panel
- Select Media Manager
2. Import Process
- Choose desired tab (Images, Icons, Videos, Audio, Files)
- Click Import Images
- Select "From a Site" from dropdown menu
3. Load Images
- Enter complete microsite URL (e.g., https://foo.com)
- Click Show Images
- Wait up to 30 seconds for images to load
- Click Import Images
Note: After you click
Import Images, it's normal if not all images load initially. You may proceed to next step.
Step 3: Populate Gallery
- Navigate to Content > Collections
- Open Gallery collection, select first placeholder image
- Click "Delete all Images"
- Click "+Image"
- Select all imported images except logo and social icons (ex Google)
- Close Image Collection popup
Step 4: Populate Hero Image and Logo
- Go to Content > Business Images
- Identify current hero image from actual microsite
- Replace top image with microsite hero image
- Replace second image with client logo
- Update alt text:
- Hero image: Change to NOB (Name of Business)
- Logo: Change to NOB logo
- Close Content Library
Step 5: Setup Color Theme
Overview: Microsites typically use two primary colors
1. Main color: Usually in the header
2. Secondary color: Often in the hero row below the header
Key Color Settings:
- Body copy: Always black
- Hero text: Always white
- Navigation, hero bar, and button text: Default to white
- Note: Designers may adjust text to a darker color if the background makes white text difficult to read.
Important Note on Fonts
- Do not update the font type, even if it differs from the microsite.
- Maintain the default Hibu One-Page website
Workflow
- Navigate to Theme > Colors.
- For each color update:
- Click the arrow next to the color to update.
- Select the color swatch to edit.
- Use the eye dropper tool (next to the hex code).
- Sample the corresponding color from the microsite.
- Update the following colors:
- "HDR - button hover": Sample from microsite header
- "Nav - button on": Sample from hero row (or buttons if hero matches header)
- "Hero Bar": Sample from header again
- Optional: If the microsite uses a yellow variant, update "Reviews Stars" with this color.
- Text Color Adjustments:
- If white text is hard to read against the selected background colors, adjust the text color to a darker shade or black font for better contrast.
- This may apply to navigation, hero bar, or button text.
Step 6: Add External Links to Navigation
Overview
- Microsites may include buttons in the hero section or links above the footer that point to external sites (e.g., Pay Now, Order Online, View Menu, Learn More).
- These external links need to be replicated on the Hibu One Page site, both in their original locations and in the site navigation.
- Update Hero Button (if applicable)
- If the microsite's hero has buttons linking to external sites, replace the default "Contact Us" button on the Hibu site with these external link buttons.
- Maintain the same text and functionality as on the microsite.
- Add External Links to Site Navigation:
- Open Pages
- Locate the Additional Link / URL placeholder
- Click the three dots at the very right of the placeholder
- Rename the page as it's labeled on the site (e.g., Pay Now, Order Online, View Menu, Learn More)
- Click "Show or Hide from Navigation" and then "Show All"
- Click "Edit External URL" and enter the complete URL
- Ensure "Open in new window" remains checked
- Repeat these steps for each external link on the microsite
Important Notes:
- Update the Hero button only when the microsite links to an external site
- Always add external links to the site navigation, regardless of their placement on the original microsite
If the microsite retains a "Contact Us" button in the hero while having other external links elsewhere, keep the Hibu site's hero "Contact Us" button as is
Step 7: Remove Duplicate Contact Information
Business Hours
- If the business operates 24 hours a day:
- Delete the business hours text in both the About Us and Contact Us sections
- Keep the Open/Close placeholder (Open 24 Hours)
- If the business does not operate 24 hours a day:
- Delete the Open/Close placeholder from both the About Us and Contact Us sections
- Keep the detailed business hours
Phone Numbers
- If only one phone number is listed:
- Keep the main phone number
- Remove the phone list placeholder
- If multiple phone numbers are listed:
- Keep the phone list with all numbers
- Remove the main phone number listed directly above the phone list
Email Addresses
- If only one email is listed:
- Keep the main email address
- Delete the email list placeholder
- If multiple emails are listed:
- Keep the email list with all addresses
- Delete the main email listed directly above the email list
Step 8: Site Check
This QA process should be performed as the final step in our conversion workflow, after all other modifications and additions have been made. It serves as a comprehensive check to ensure the Hibu One Page site accurately represents the original microsite, functions correctly, and provides a good user experience across all devices.
Device Compatibility Check
- Review the site on desktop, tablet, and mobile devices
- Ensure layout and content display correctly on all three device types
External Link Verification
- Click all external links on each device
- Confirm that each link directs the user to the correct external site
- Verify that links open in a new window/tab as intended
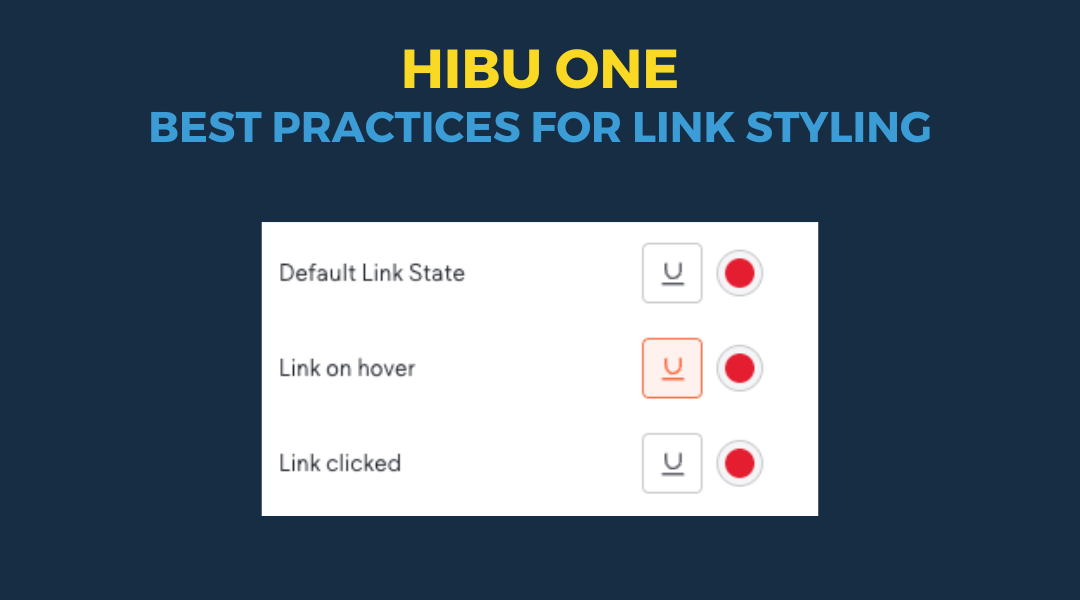
Text Readability
- Check readability of:
- Navigation labels
- Button text
- Hero bar text
- Footer text
- If text is difficult to read, update to a darker color or black as necessary
Overall Content Review
- Scan all content for any remaining placeholder text or images
- Verify that all content from the microsite has been accurately transferred
Step 9: Site Backup
- post_build_firstlast (post_build_james-clark)