How to Update Run-of-Site Request CTA Buttons and Headlines in Editor 2.0
This post covers
two important processes for updating Request CTAs:
- Part 1 is for
Copywriters and Designers — setting up the Request CTA at the start of a site build.
- Part 2 is for
Customer Service and Amends Teams — updating an existing Request CTA after the site is live.
You’ll notice there are several steps. That’s because we're using
collections and
connected data to control buttons, headlines, and links across the entire site.
Why this matters:
- It's
much faster than updating every button, link, and page one-by-one.
- It keeps the website
consistent for users and search engines.
- It makes future updates
easier and faster for anyone working on the site.
- It reduces the chance of broken links or mismatched CTAs.
- It sets us up for
scalable site management as we grow.
Both parts must be done
carefully and
in the exact order shown to make sure everything stays connected and working properly.
Part 1: Setting Up the Request CTA at the Start of the Build
(for Copywriters and Designers)
In
Part 1, you’re laying the groundwork. You are using
collections and
connected data to make sure the CTA buttons, links, and headlines are consistent across the entire site.
Even though there are a few steps, it’s
still much faster than manually updating dozens of buttons and pages later. Following these steps now makes future changes quicker and protects site quality.
NOTE: Example CTA for the following is
Request Free Estimate
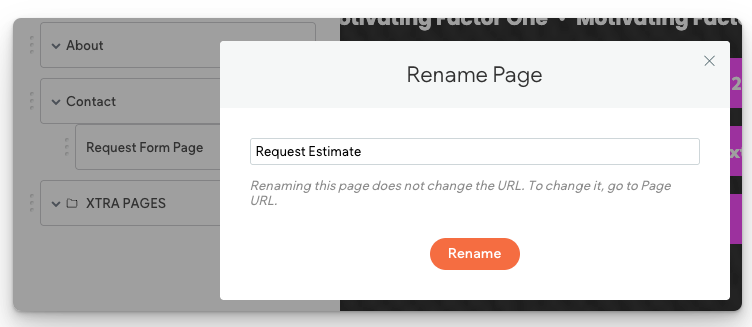
Step 1: Rename the Request Form Page (update page name / nav label)
- Go to the page named
Request Form Page.
- Rename it to
Request Estimate (do
not include "Free").
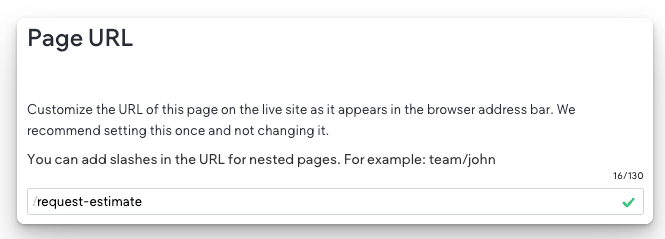
Step 2: Update the Page Slug
- Change the page slug from
request-form-page to
request-estimate.
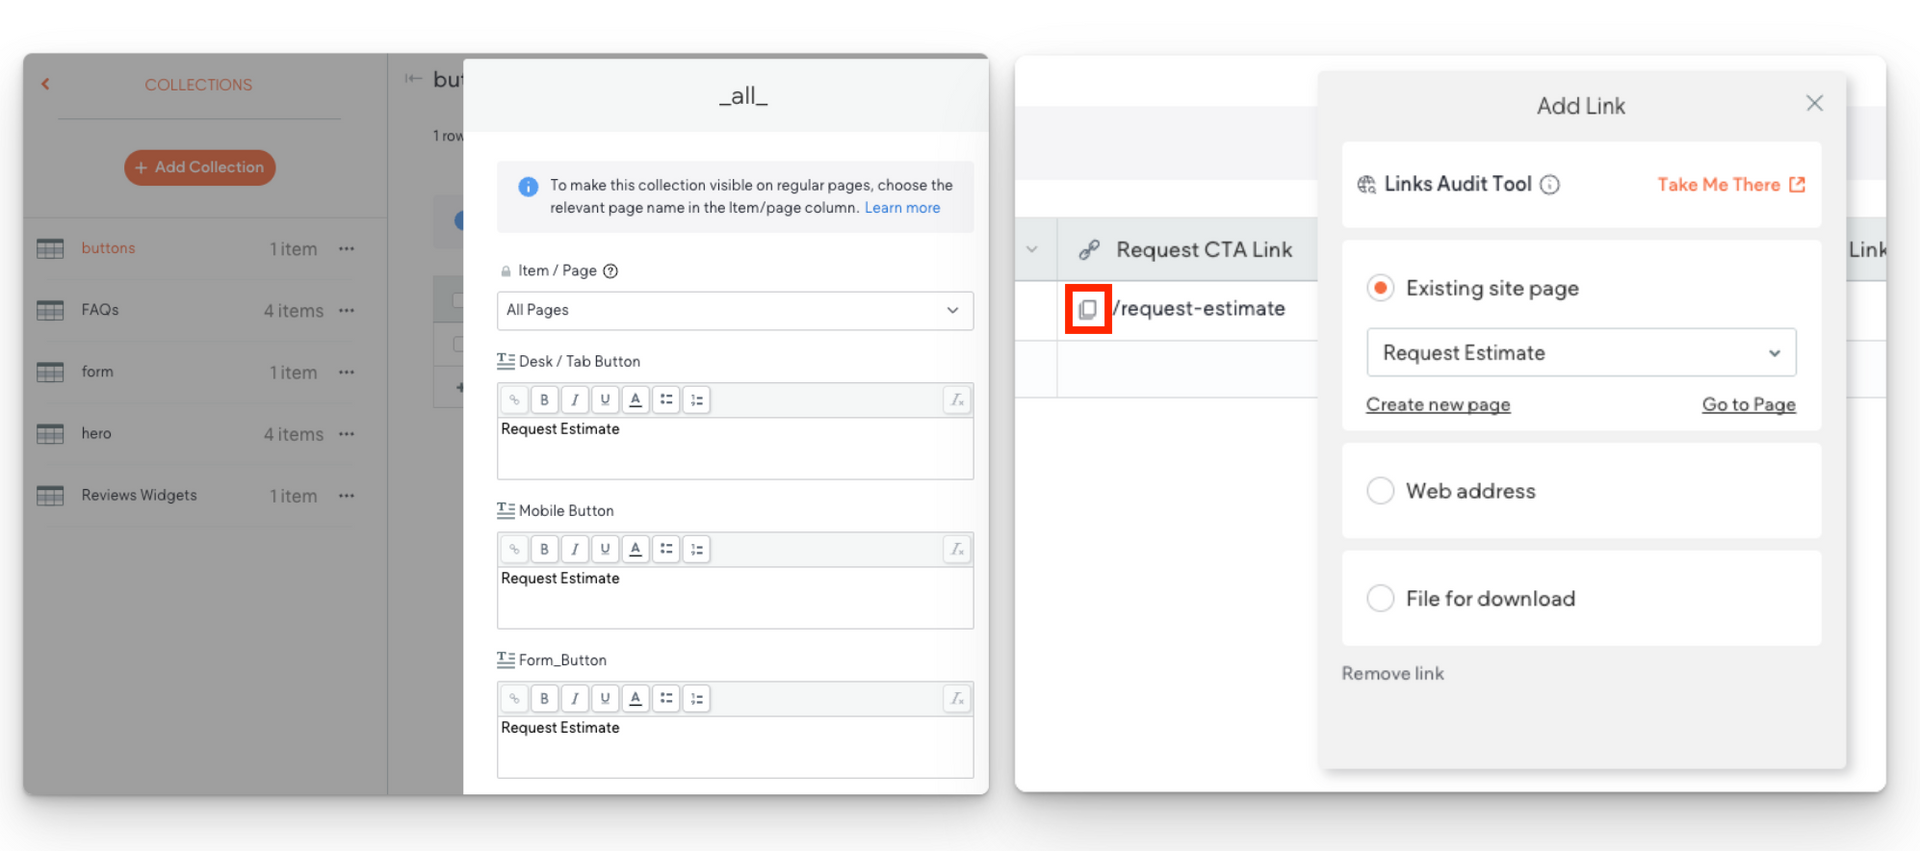
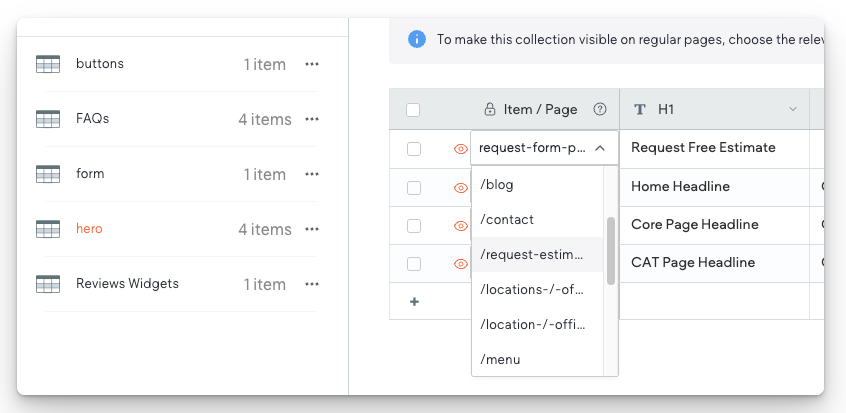
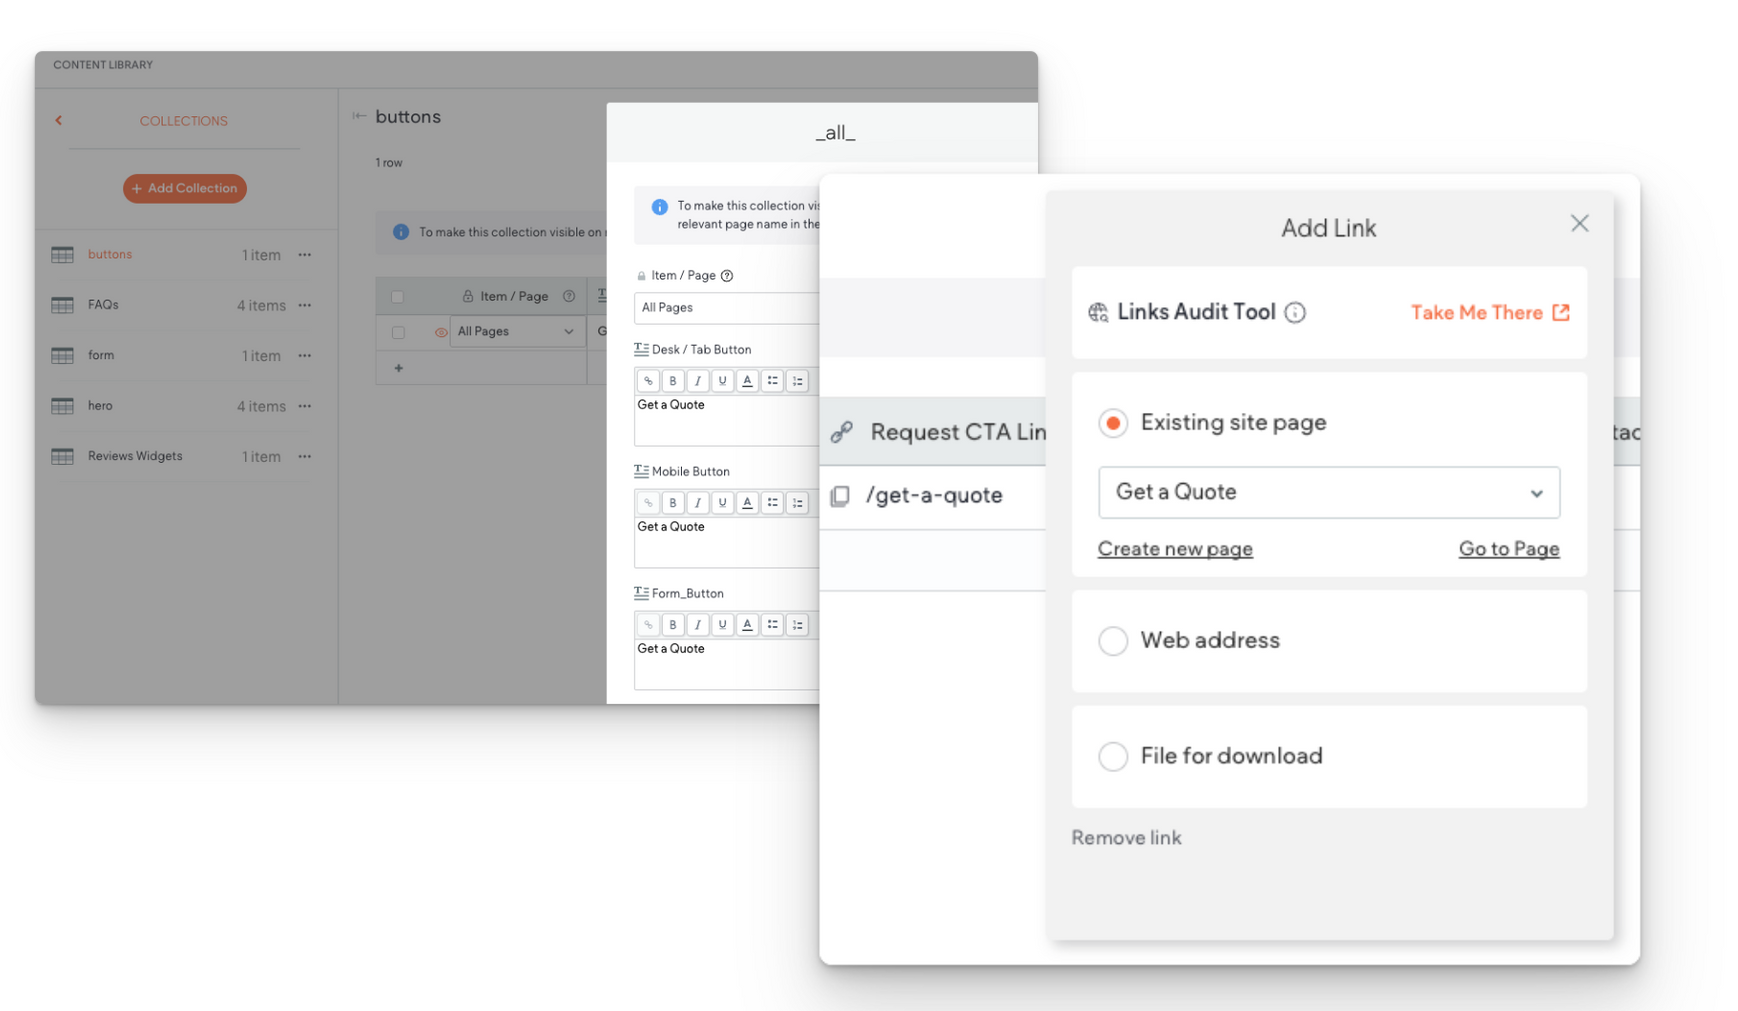
Step 3: Update the Button Collection (update button labels and link)
- Find the
Button Collection.
- Click the
pencil icon next to the eyeball to edit.
- Update these 3 button fields:
- Desktop/Tablet Button
- Mobile Button
- Form Button
- Overwrite Request CTA with Request Estimate (no "Free" in the button text).
- Close the edit window.
- Then:
- Find the old
/request-form-page link.
- Click the
copy icon.
- Update the link to
/request-estimate.
- Update the Form Title field:
- Set it to
Request Estimate
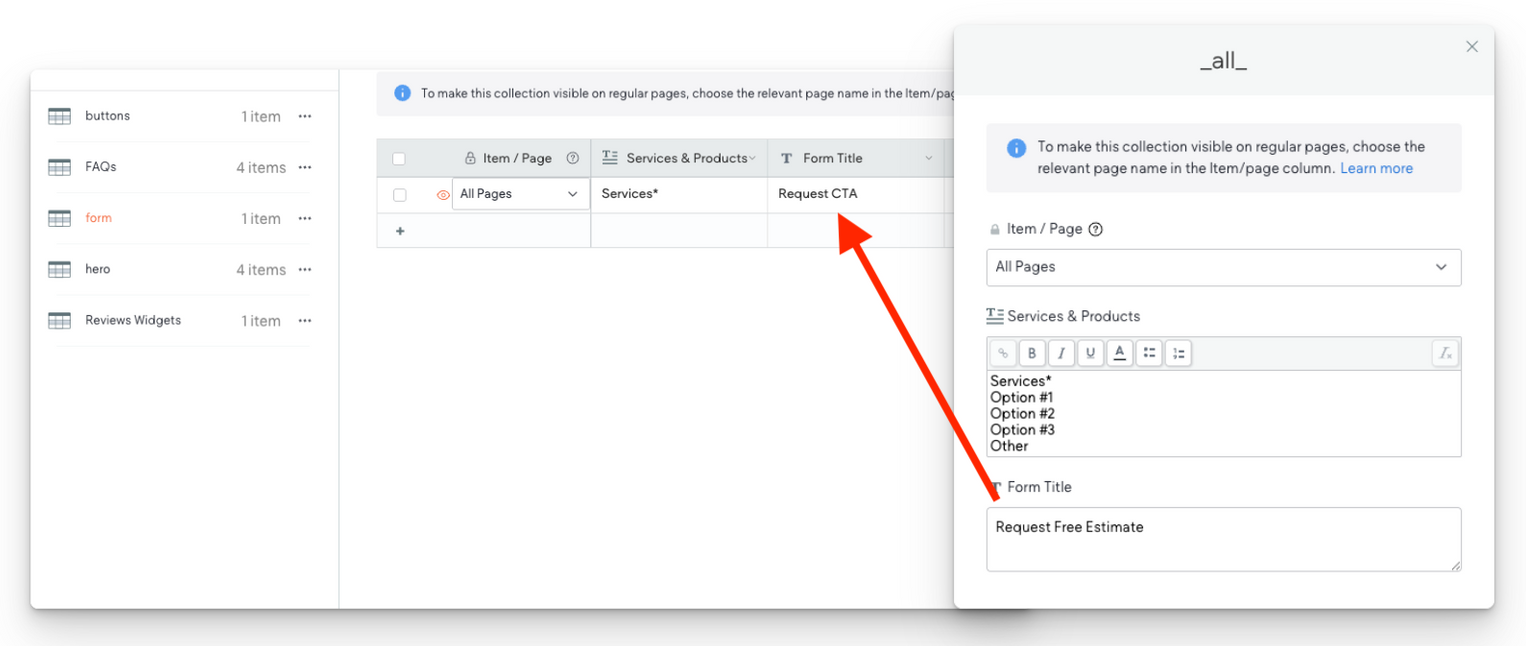
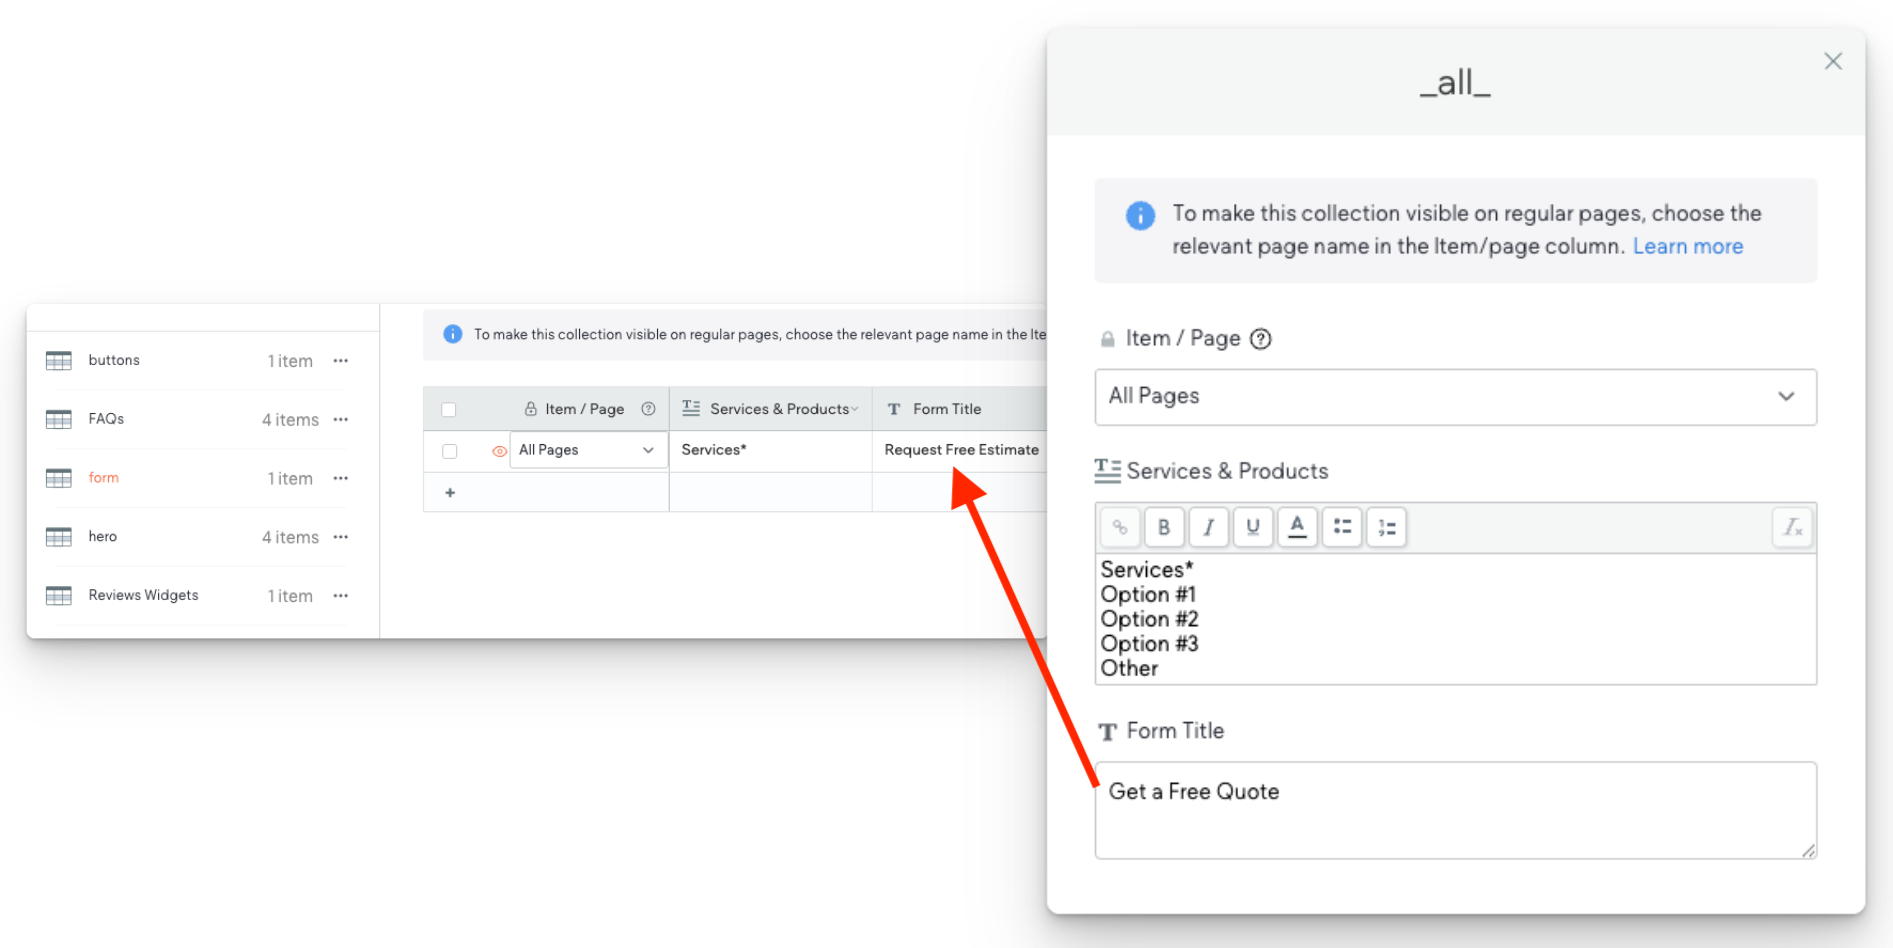
Step 4: Update the Form Collection (updates superhero form title)
- Find the
Form Collection.
- Click the
pencil icon next to the eyeball to edit.
- Update the Form Title field
- Set it to
Request Free Estimate (this is where "Free" is added).
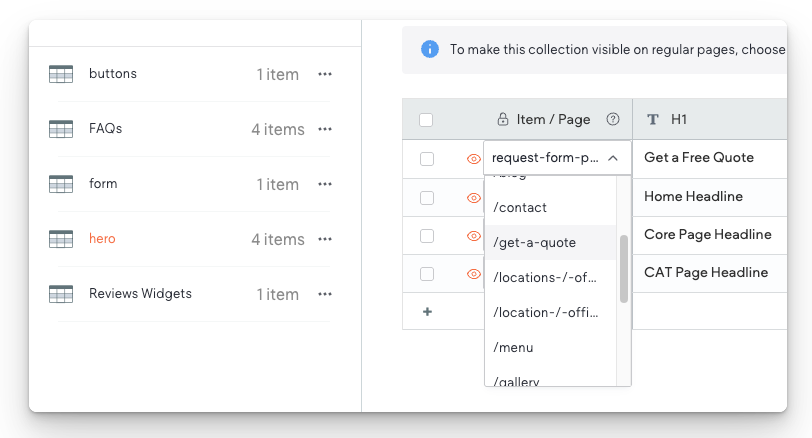
Step 5: Update the Hero Collection (updates request form page thin hero H1)
- Find the
Hero Collection.
- Locate the
top row, first position.
- Update the link:
- Change from
/request-form-page to
/request-estimate.
- Click the
pencil icon.
- Update the related
H1 field
- Set it to
Request Free Estimate (this is where "Free" is added).
Part 2: Updating the Request CTA After the Site is Live
(for Customer Service and Amends Teams)
In
Part 2, you're updating a live site that already uses
connected data. Because the site is set up correctly, you only need to make changes once in each collection — no need to click through every page. This keeps updates
quick,
accurate, and
future-proof.
Example Update:
Changing from
Request Free Estimate →
Get a Free Quote
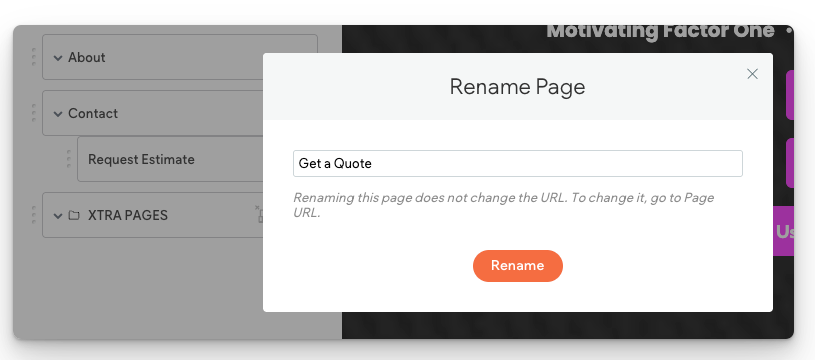
Step 1: Rename the Request Form Page (update page name / nav label)
- Find the existing
Request Estimate or
Request Free Estimate page.
- Rename it to
Get a Quote (no "Free" in the page name).
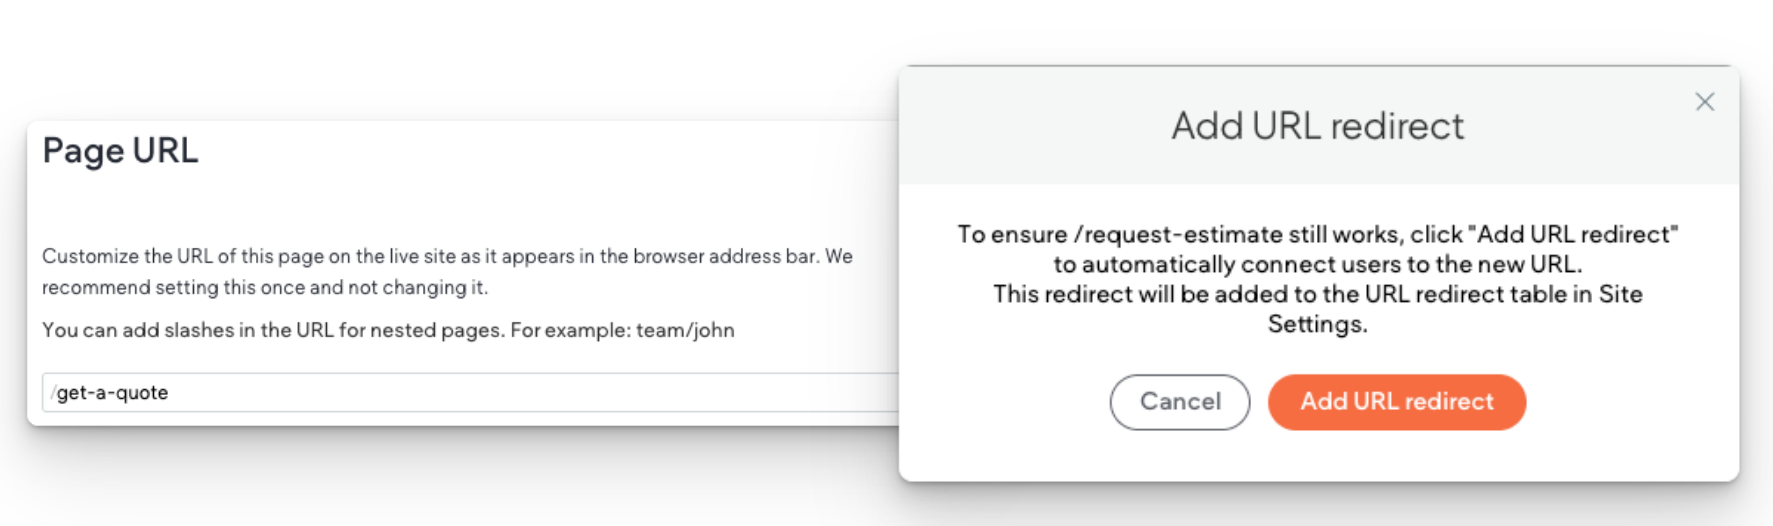
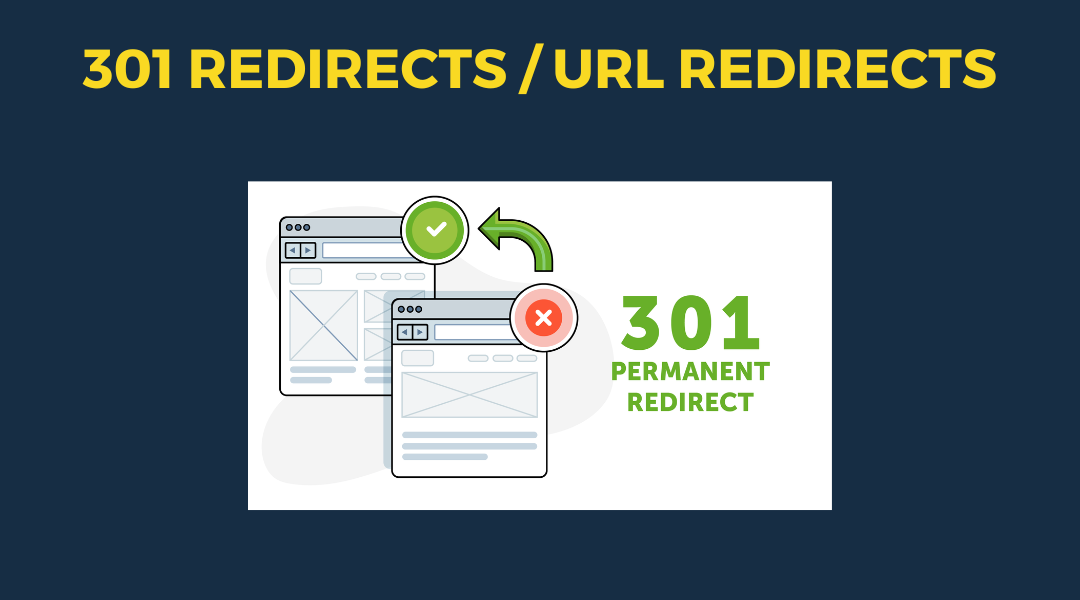
Step 2: Update the Page Slug and add 301 Redirect
- Change the slug from
request-estimate to
get-a-quote.
- If the site is live, you’ll see a prompt to add a URL redirect. Click
Add URL Redirect to confirm.
- If the site is not live, you can skip the redirect — it's not needed.
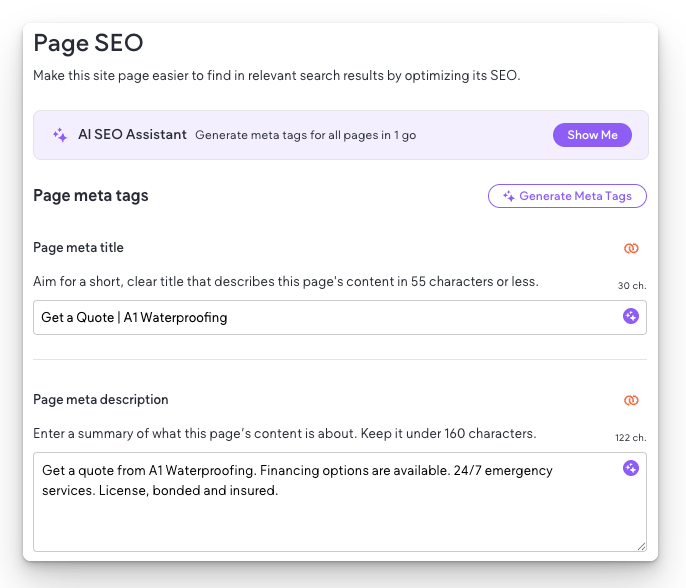
Step 3: Update the Title Tag and Meta Description
While still in the page settings:
- Title Tag: Replace
Request estimate
with
Get a quote.
- Meta Description: Replace
Request estimate with
Get a quote.
Step 4: Update the Button Collection (update button labels and link)
- Find the
Button Collection.
- Click the
pencil icon next to the eyeball to edit.
- Update these 3 button fields:
- Desktop/Tablet Button
- Mobile Button
- Form Button
- Overwrite Request Estimate with
Get a Quote (no "Free" in the button text).
- Close the edit window.
- Then:
- Find the old
/request-estimate link.
- Click the
copy icon.
- Update the link to
/get-a-quote.
Step 5: Update the Form Collection (updates superhero form title)
- Find the
Form Collection.
- Click the
pencil icon next to the eyeball to edit.
- Update the Form Title field
- Overwrite Request a Free Estimate with
Get a Free Quote (this is where "Free" is added).
Step 6: Update the Hero Collection (updates request form page thin hero H1)
- Find the
Hero Collection.
- Locate the
top row, first position.
- Update the link:
- Change from /request-estimate. to /get-a-quote
- Click the
pencil icon.
- Update the related
H1 field
- Set it to
Get a Free Quote (this is where "Free" is added).